Subscription Management
 Subscription Management
Introduction
This guide explains how to use the "Subscription Management" function in the GPM.NET system, helping users understand and complete the service subscription process.
Operating Instructions
-
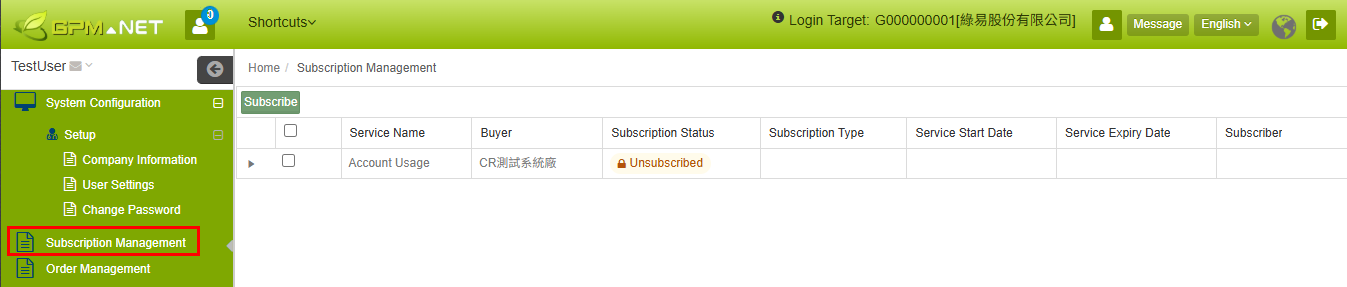
Go to "Subscription Management" from the left-side function menu.
-
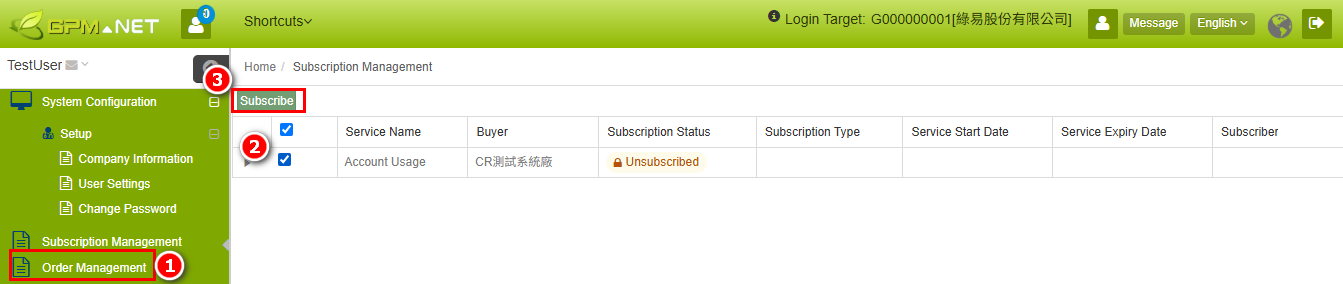
In the Subscription Management list, find and select the service you wish to subscribe to, then click "Subscribe" at the top of the page.
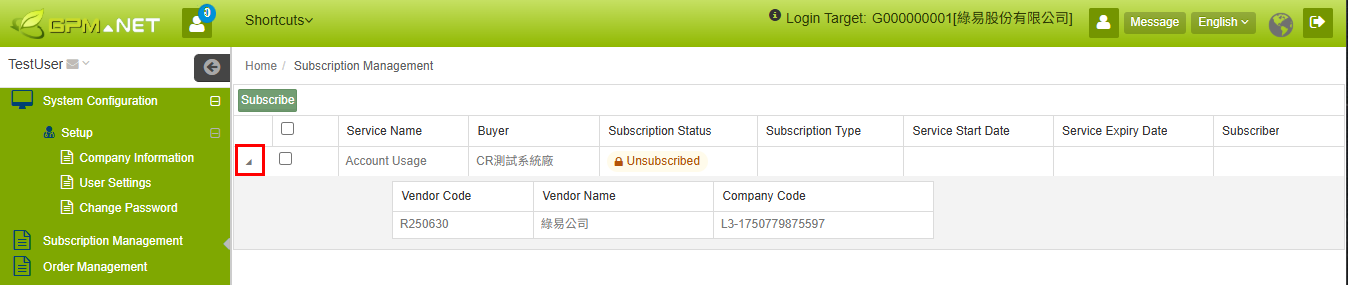
- If you need to confirm supplier information, expand the item to view the Vendor Code, Vendor Name, and Company Code.
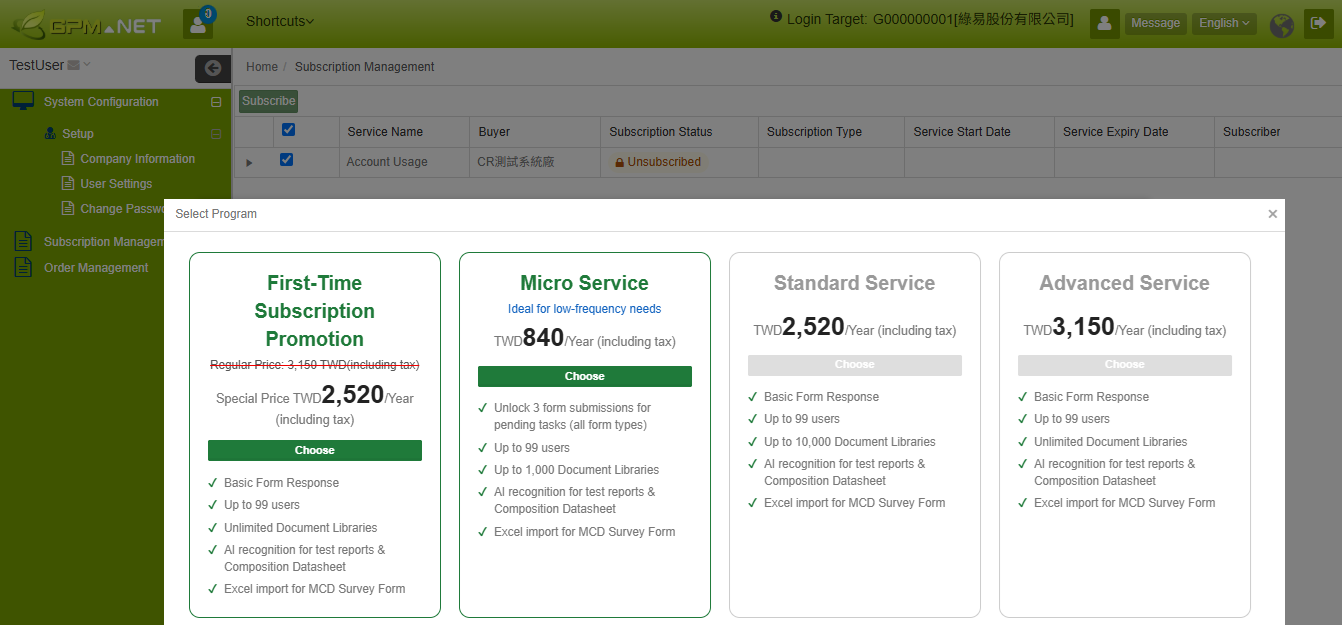
- On the "Select Plan" page, choose the required Subscription Plan and click "Choose".
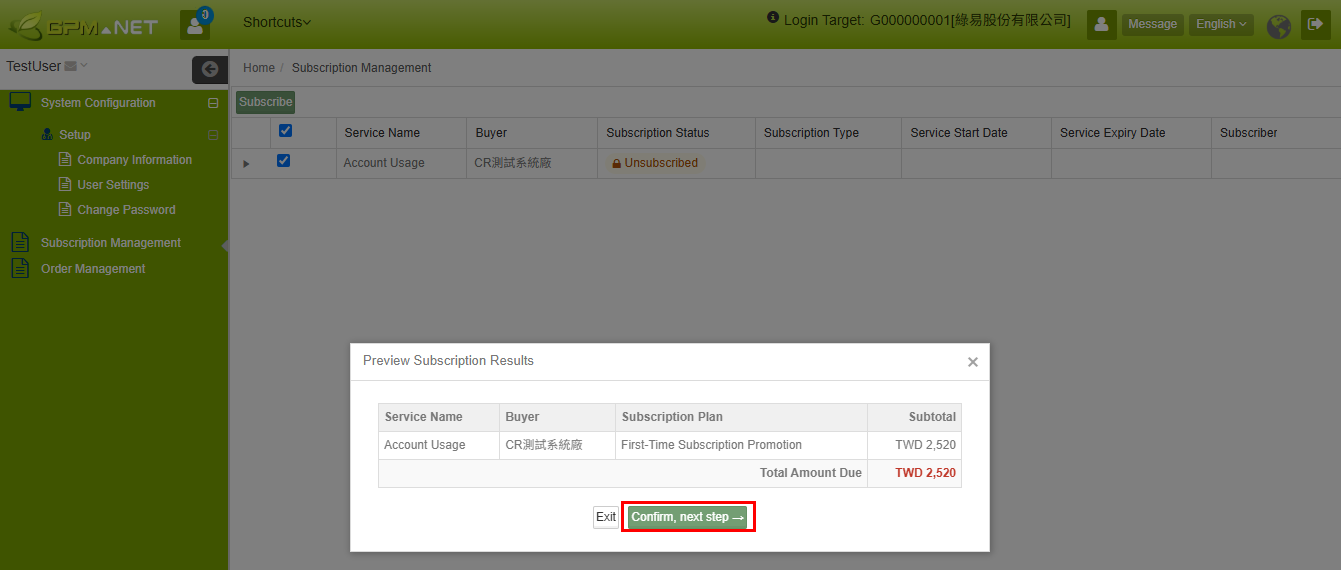
- On the "Preview Subscription Result" page, verify the Service Name, Buyer, Subscription Plan, Subtotal, and Total Amount Due. After confirming that all information is correct, click "Confirm, next step→".
-
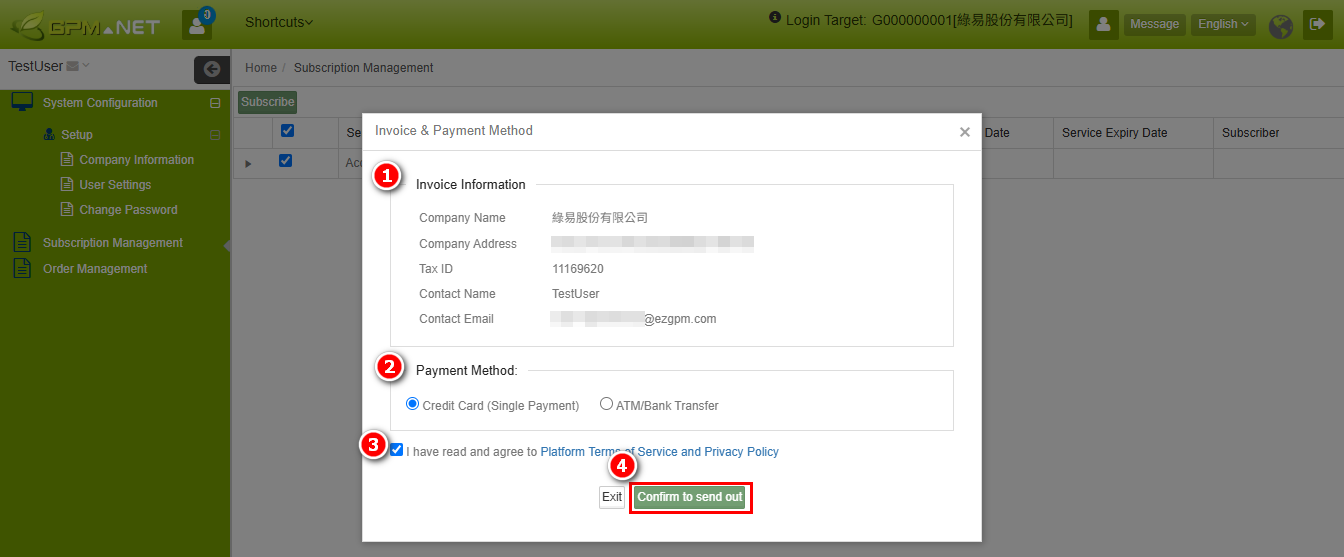
On the "Invoice & Payment Method" page
-
Verify the Invoice information, including Company Name, Company Address, Unified Business Number, Contact Name, and Contact Email.
-
Select a Payment Method. The available payment methods are automatically provided based on the supplier company's location.
- Taiwan companies: Credit Card, ATM/Bank Transfer
- Mainland China companies: UnionPay, Alipay
- Other overseas companies: Credit Card
-
Select "I have read and agree to the Platform Terms of Service and Privacy Policy".
-
Click "Confirm Submit" to submit the order. The example below uses Credit Card payment.
-
Modify Information To modify the company information shown on the Invoice, please contact platform customer support.
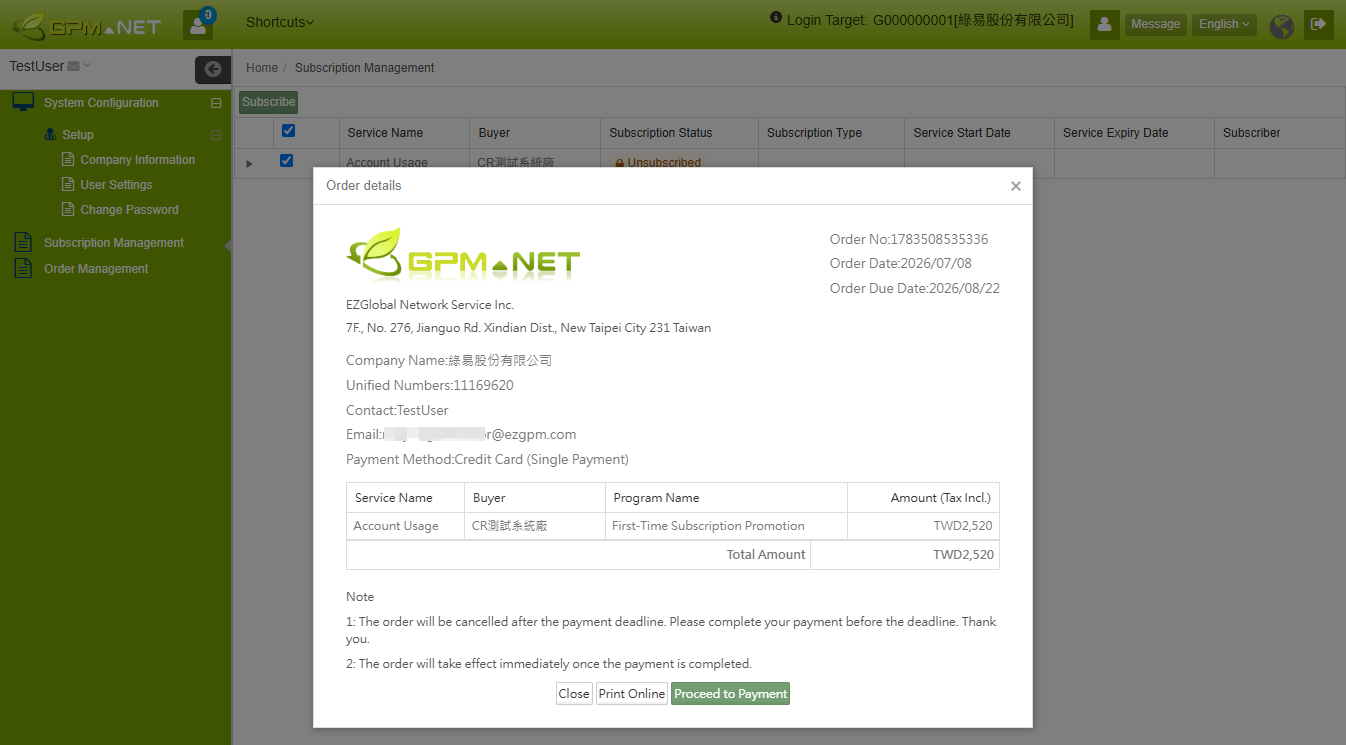
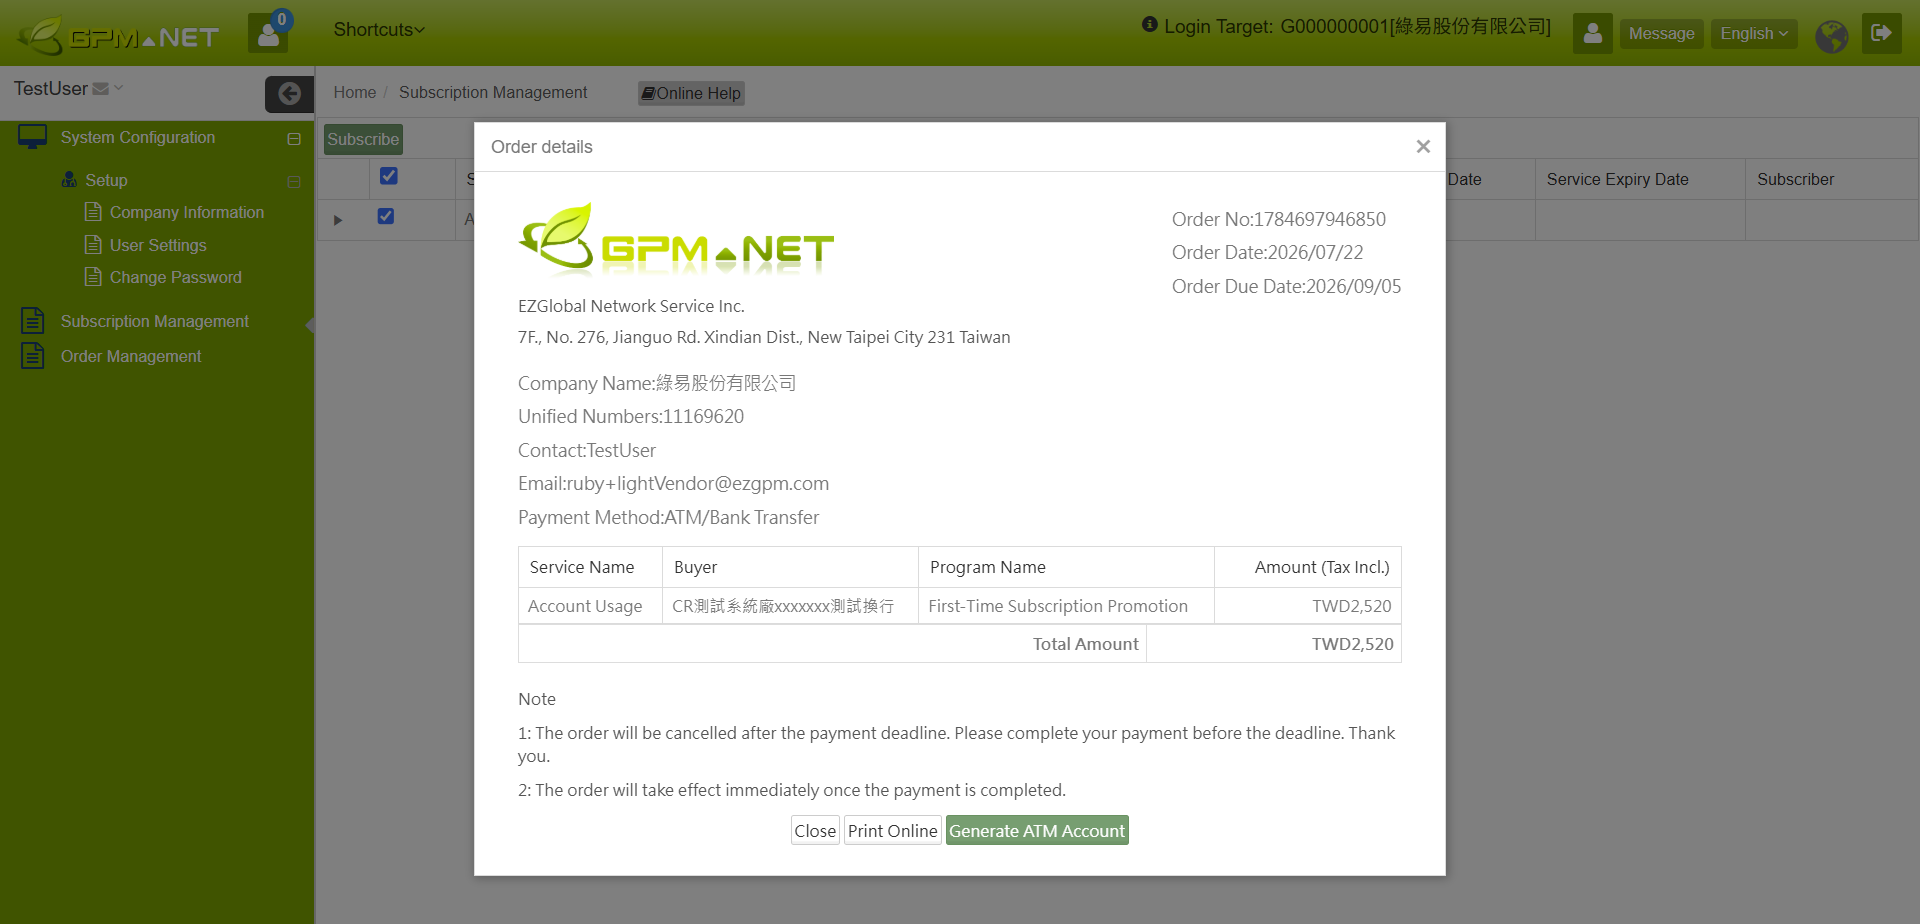
- The system displays the corresponding "Order Details" screen based on the selected Payment Method. Please verify the Order ID, Order Date, Payment Deadline, Company Information, Contact Information, Payment Method, Service Details, and Total Amount Due.
-
Screen for Credit Card, Alipay, and UnionPay
-
Screen for ATM/Bank Transfer
-
If the Payment Method is "ATM/Bank Transfer", first click "Generate ATM Account" to go to the NewebPay page and generate a virtual account. Then go to "Order Management" and use Print Online to display the virtual account information.
- Once the order is created, the system sends an order confirmation email to the subscriber. The email includes the Order ID, Order Date, Total Amount Due, and Payment Deadline. To protect information and financial security, please confirm that the only official notification email address is: service@ezgpm.net.
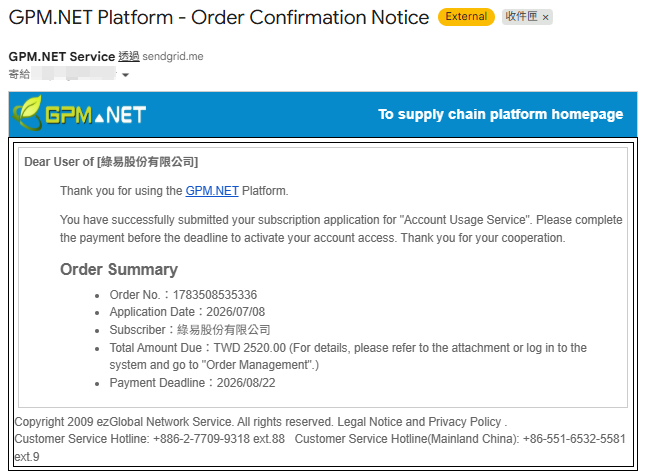
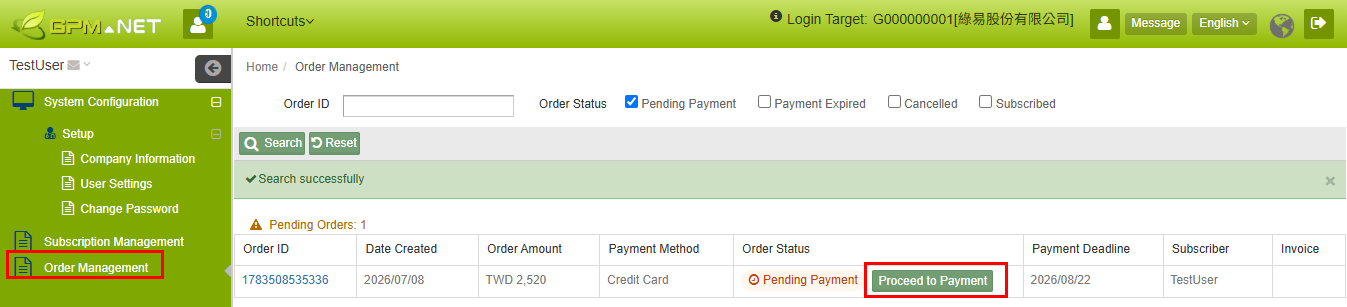
- If you can pay immediately, click "Proceed to Payment" to go to the NewebPay payment page and complete the payment process.
- If you cannot pay immediately, go to "Order Management" when you are ready to pay to start the payment process.
See Basic Operations > Order Management
- After the order is created, if payment is not completed by the Payment Deadline, the system will automatically cancel the order. You will need to restart the subscription process.
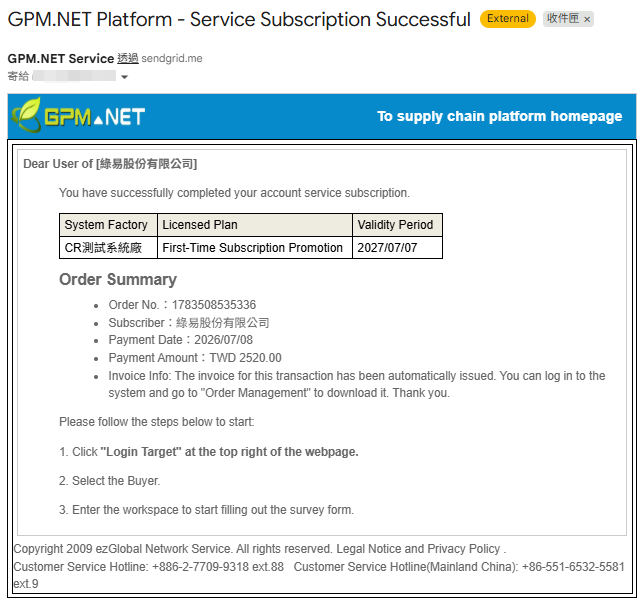
- After reconciliation by the payment system is completed (approximately 10 minutes), the payment system sends an e-invoice issuance notice and a payment result notice to the subscriber. The platform also sends a service subscription successful notification.
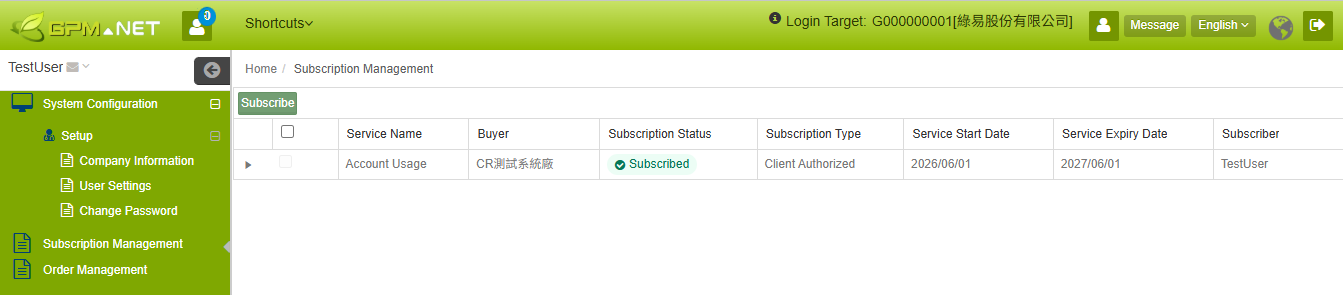
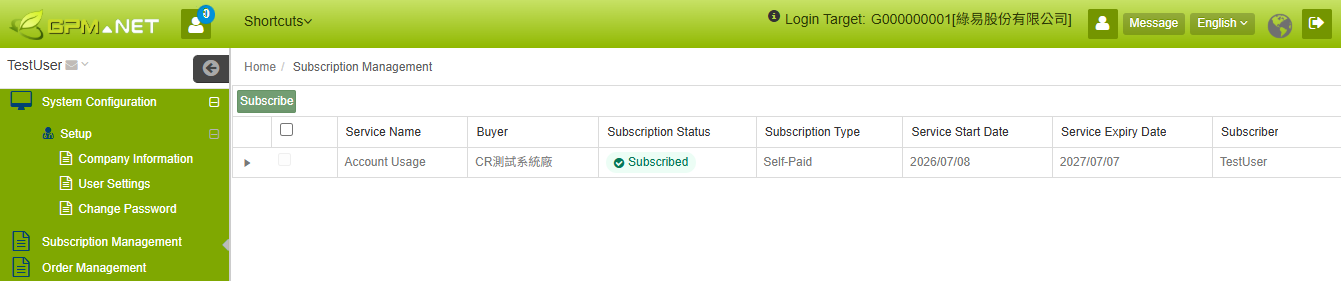
- Return to the Subscription Management page. The Subscription Status will be shown as "Subscribed".
Subscribe with Activation Code
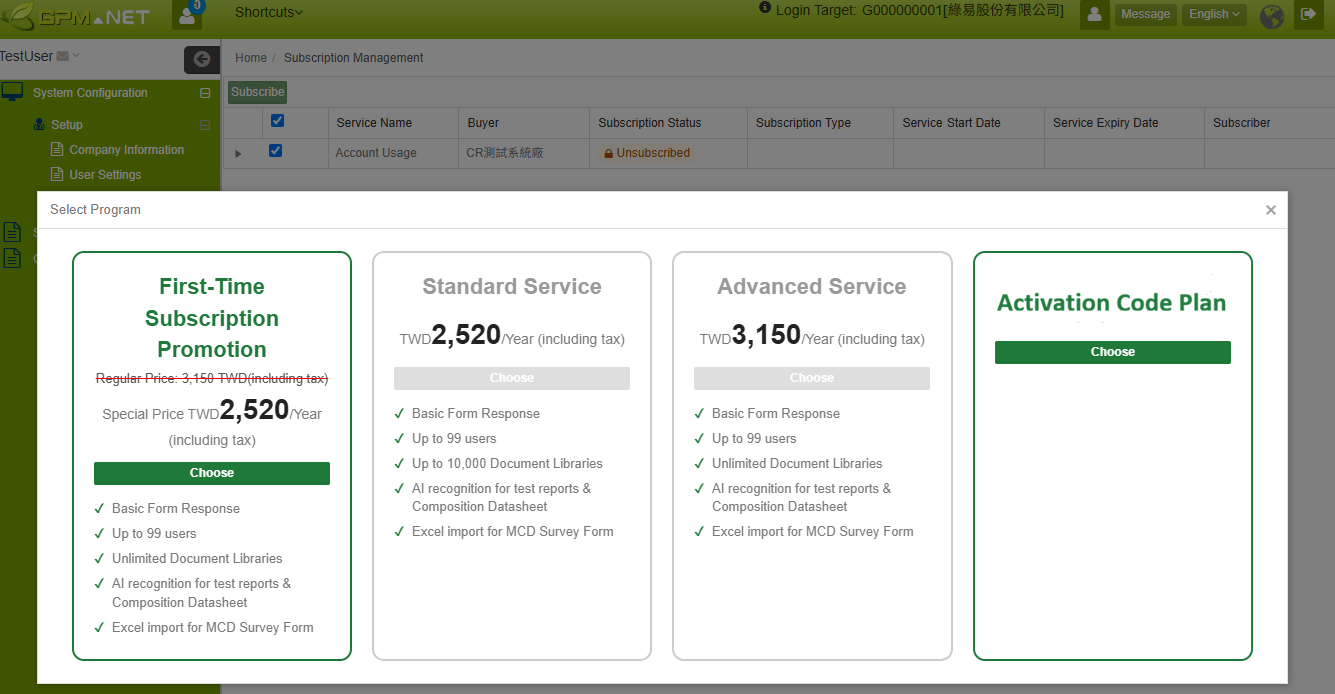
- If you have obtained an Activation Code, an additional Subscription Plan "Activation Code Plan" will appear on the "Select Plan" page.
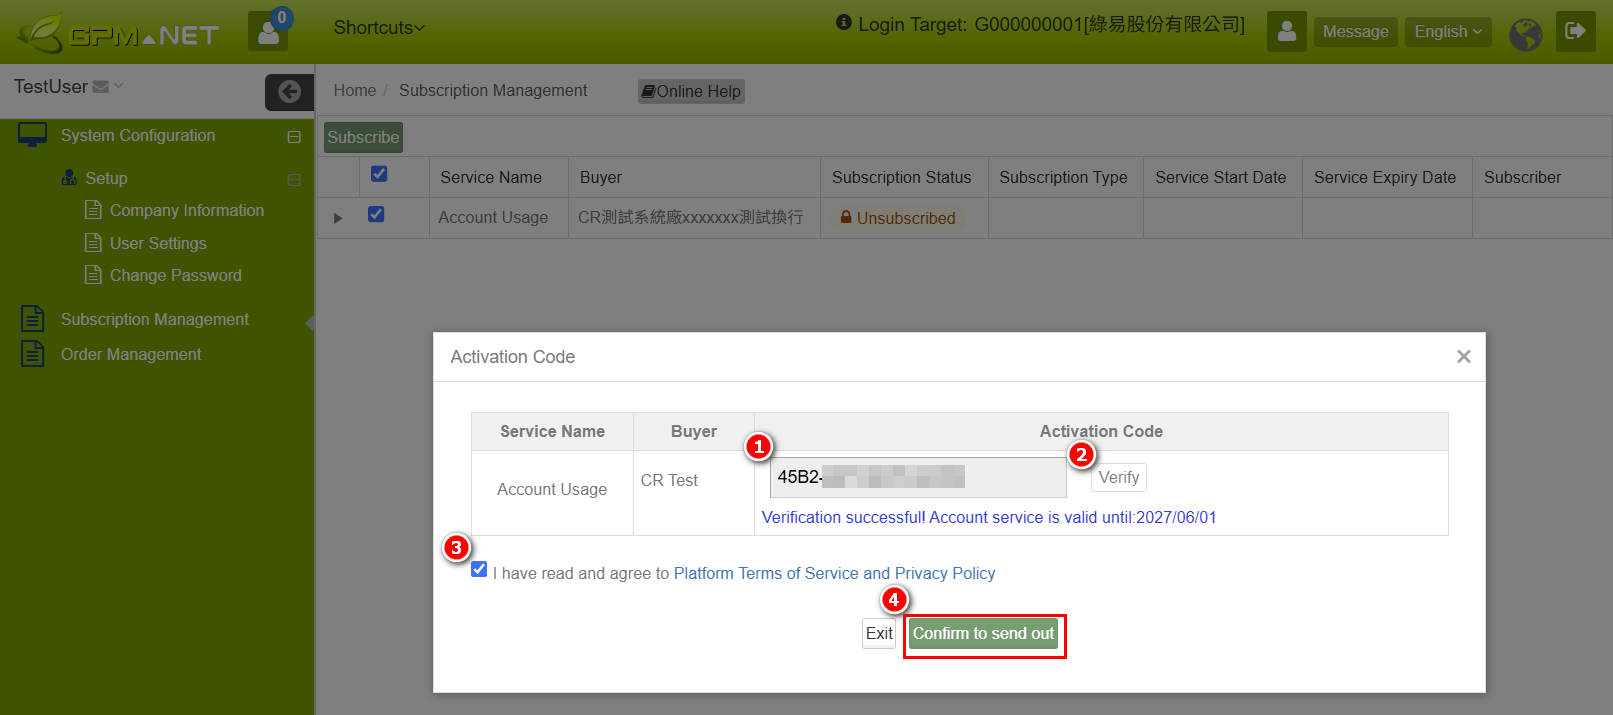
- On the "Activation Code" page, enter the Activation Code and verify it to confirm that it can be used. After confirming that the information is correct, select "I have read and agree to the Platform Terms of Service and Privacy Policy" and click "Confirm Submit".
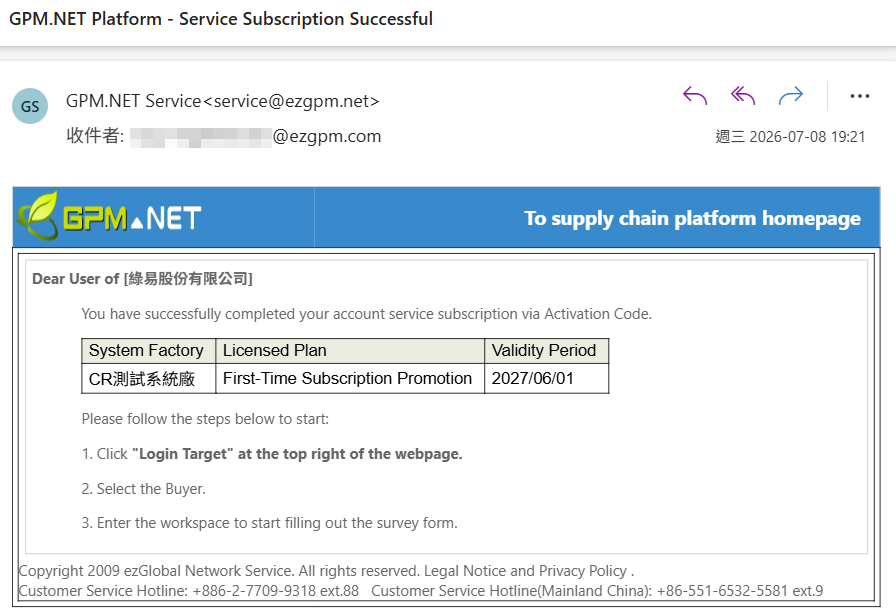
- After the subscription is completed, the system displays a message indicating that activation was successful.
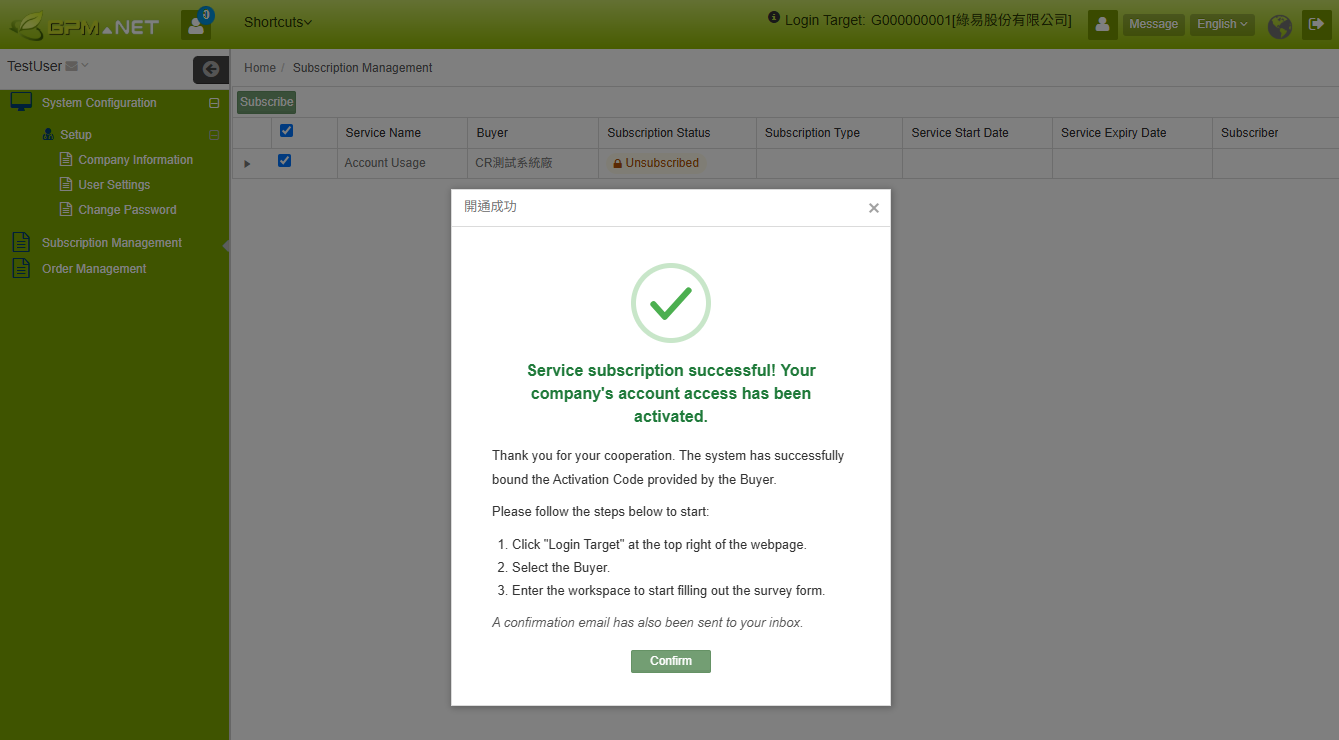
- The system also sends a service subscription successful notification email.
- Return to the Subscription Management page. The Subscription Status will be shown as "Subscribed".